Cabinet Refinishing Modesto Anchor is a less-expensive option for homeowners who want to change the look of their kitchen. It is also a more flexible process than cabinet refacing.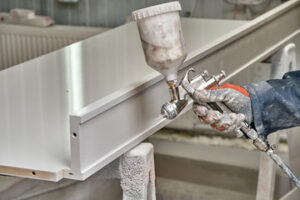
Refinishing is best for cabinets with minor wear, such as scratches, stains, and nicks. However, it isn’t an option for those with laminate or thermofoil cabinets as they can’t be sanded.
Cabinet painting is a big project and requires proper preparation. The first thing to do is clean the cabinets to remove all grease, oil and dirt build up that can cause poor adhesion of paint. It’s important to use a degreaser such as Krud Kutter or TSP (trisodium phosphate).
Then you should lightly sand all surfaces, including the doors and drawer fronts, to scuff up the existing sheen on the surface and create a rougher surface for the primer and paint to adhere to. Always wipe down all surfaces after sanding with a tack cloth or damp rag to remove any dust that remains.
It is also a good idea to apply a coat of primer before painting, especially if the new color will be drastically different than the current finish. This will help ensure the paint adheres to the cabinets and prevent stains from bleeding through later.
After the primer has dried you can begin painting. It’s a good idea to use a spray can for larger flat surfaces like the cabinets and doors, but for hard-to-reach spots use a brush. Try to maintain a wet edge by over-lapping your brush strokes slightly while the paint is still wet, this will help blend them and make for a smoother finish.
Once the first coat of paint has dried you can reattach any hardware, hinges, or handles that you removed to the cabinets and then touch up any areas where the original paint has started to chip. It’s important to wait for the maximum recoat time on the back of the can as some paint can take up to 16 hours to fully dry.
Another great tip is to protect your floors while painting, use plastic or tarps to cover carpeting and wood flooring and place painter’s tape around the edges of any walls that may be getting painted. This will keep any drips from getting on your walls or ceilings. It’s also a good idea to put protective covers on your furniture such as chairs, tables or stools that might come into contact with the cabinets while you are painting them.
Staining
If you love the style of your cabinets but wish they were a different color, staining is an option that allows you to make the transformation without replacing cabinet doors. The process involves sanding down the existing cabinets and then applying a new stain to achieve your desired color. The finished product is then sealed with a protective clear coat to ensure durability.
Before beginning, determine what type of stain you want to use. Stains come in a variety of colors and can drastically alter the look and feel of a room, particularly the kitchen. Lighter stains can make a space appear larger while darker stains provide more warmth. It’s also important to choose a stain that works well with the wood from which your cabinets are made. Different species of wood respond differently to stains, and the natural grain of the wood can affect how the finish looks.
To begin the staining process, start by removing your cabinet doors and drawer faces, along with their hinges, handles, knobs and closures. Place all hardware in labeled baggies to keep it organized and prevent any misplacement when reinstalling the items. Once all pieces are removed, wipe down the surfaces to remove any lingering dirt or dust. Next, sand all surfaces using a sheet sander for flat areas and a manual sander for curved or detailed sections. Once all surfaces are smooth and free of debris, thoroughly clean the cabinets with mineral spirits to prepare them for staining.
Apply a thin coat of the chosen stain to each cabinet door and cabinet box, following the wood’s grain for even coloration. Wait for each coat to dry completely before applying another. Depending on the desired look, you can add multiple coats of stain. Once the final coat is dried, wipe down the surface again and apply a protective clear sealant to ensure durability.
Staining cabinets is a major undertaking, but it’s one that can be completed in a relatively short amount of time. This is especially true if you hire a professional. They’ll have the tools and expertise to get the job done efficiently and effectively.
Repairing
Cabinet refinishing is a more budget-friendly and environmentally friendly alternative to replacing cabinets. Refinishing is a process that involves cleaning and degreasing interior wood surfaces before staining or painting them. This project can be time consuming, but it is something that any DIY enthusiast can do with proper planning and the right tools. However, before you start sanding and repainting your cabinet doors, it’s important to take the time to repair any chips or scratches. This will prevent the new finish from peeling or flaking prematurely and will give you a smooth and clean surface to work with.
To repair nicks or scratches on your cabinet doors, use a putty or wood filler and then lightly sand it to smooth out the patch before refinishing. You can also add a clear protective sealant after the final coat of stain or paint to further protect your cabinetry from moisture, stains and wear. This will also prolong the life of your new finish.
One common problem with cabinet doors is that they can become warped from moisture. This is caused by a process called “breathing” where the wood expands and contracts with changes in temperature and humidity. To prevent this, you can use a dehumidifier and use a range hood when cooking. You can also lubricate the hinges and drawer glides with silicone-based lubricant to keep them from squeaking.
Another way to protect your cabinets is by using a protective UV coating. This will protect the finish from sun damage and will extend its life. It is important to choose a UV-protective coating that is specifically designed for cabinet finishes, and that it will adhere properly.
If your kitchen cabinets are starting to look worn or outdated, refinishing them can be an excellent solution for updating your space. The beauty of refinishing is that you can preserve the existing materials and design of your cabinets, while introducing a modern style or color that you love. Refinishing is also a great option for preserving vintage or antique cabinets, and it is a cost-friendly alternative to full replacement.
Installation
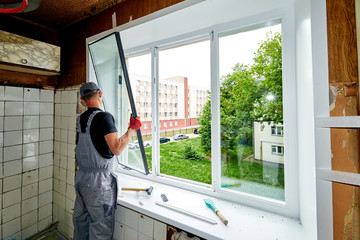
Cabinet refacing is a great option for homeowners who want to completely revamp their kitchen’s look and feel that replacing their existing cabinets is too expensive. This involves removing the interior of your cabinets, which includes the door frames and hinges, then installing new doors and drawer fronts in your choice of material and style.
Refacing is a more extensive process than refinishing, and it can take weeks to complete. To ensure a successful result, it’s important to prepare properly before starting the project, including clearing out your kitchen and protecting countertops and appliances with covers. You may also need to set up a temporary kitchen space.
Before beginning, it’s a good idea to clear out your cabinets and remove any hardware you no longer use. This will make it easier to work and prevent damage as you strip and sand the surface of your cabinets. You’ll also need to make sure your workspace is well-ventilated, and that you wear eye protection and chemical gloves while working.
Once the surfaces are clean and dry, it’s time to start working on your paint or stain. Choose a color that you love and is consistent with your kitchen’s design scheme. It’s also a good idea to view color samples in your space at different times of the day, as lighting can affect how colors appear. It’s also a good idea for your professional to apply a high-quality sealant to protect your newly refinished cabinets from moisture and dirt, prolonging their life.
The best part about refinishing is that you get to keep the existing cabinet boxes and door styles, but change the color. This is an excellent choice for homeowners who have higher-quality cabinetry that they don’t want to replace, as it preserves their original look and can add a whole lot of value to your home if you ever decide to sell.
Refacing, on the other hand, gives you a fresh, updated look that’s more dramatic and offers an entirely new kitchen design. You can opt to keep the same door style or go for a completely different look, and there are endless modern finishes, materials, and hardware options.